


Cisco Meraki Z4C
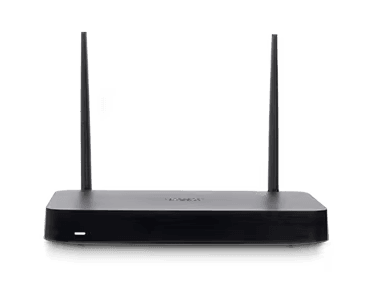
Integrated cellular failover in an elegantly designed secure remote-work gateway with Wi-Fi 6

Important Licensing Information: To activate and manage your Cisco Meraki Teleworker Gateway, a purchase of a Cisco Meraki license is mandatory.
List Price:
Our Price: $1,353.90
List Price:
Our Price: $209.59
List Price:
Our Price: $471.60
List Price:
Our Price: $785.99
Click here to jump to more pricing!
Overview:
Flawless office-like connectivity with added cellular resiliency and enterprise-level security.
The Cisco Meraki Z4C teleworker gateway is an enterprise class firewall, VPN gateway and router. This device offers wireless connectivity with WiFi 6, five gigabit ethernet ports, including a built-in PoE-enabled port for VoIP phones and other PoE powered devices. The Z4C is designed to securely extend the power of Meraki cloud managed networking to almost any location. With a built-in LTE modem, the Z4C simplifies any deployment that requires a backup cellular uplink, or is positioned in a remote location.
Beyond best-effort remote work
- Build the most efficient and scalable long-term remote work strategy
- Secure internet access with Cisco AMP, ThreatGrid, and content filtering
- WAN: 1 GbE; integrated Cat 12 LTE modem
- LAN: 4 GbE (1x PoE-enabled port)
- Wi-Fi: dual-band 2x2 Wi-Fi 6
- 500 Mbps firewall throughput
- 250 Mbps site-to-site VPN throughput
Configure your Dashboard Network
The following is a brief overview only of the steps required to add an Z4C to your network. For detailed instructions, please Contact Us.
- Login to http://dashboard.meraki.com. If this is your first time, create a new account.
- Find the network to which you plan to add your Z4C or create a new network.
- Add your Z4C to your network. You will need your Meraki order number (found on your invoice) or the serial number of each Z4C, which looks like Qxxx-xxxx-xxxx, and is found on the bottom of the unit. If a license key was purchased at the same time then you should have received it via email.
- Go to the map / floor plan view and place each Z4C on the map by clicking and dragging it to the location where you plan to mount it.
Pricing Notes:
- Pricing and product availability subject to change without notice.
Important Licensing Information: To activate and manage your Cisco Meraki Teleworker Gateway, a purchase of a Cisco Meraki license is mandatory.
List Price:
Our Price: $1,353.90
List Price:
Our Price: $209.59
List Price:
Our Price: $471.60
List Price:
Our Price: $785.99
List Price:
Our Price: $240.23
List Price:
Our Price: $540.54
List Price:
Our Price: $900.89
List Price:
Our Price: $1,261.25
List Price:
Our Price: $2,297.52
List Price:
Our Price: $157.24
List Price:
Our Price: $106.30